My Dealla Cardigan

I found a sweater/cardigan pattern of Celtic design that I fell in love with.  It is on Ravelry, if any  of you are interested.

It can be bought as a single pattern or as a book from the Knit Picks website.  If you decide to by the book, spend the extra money and have a hard copy sent to you.  If you opt for the e-file, it is 65 pages long and will use up all of your ink.   So it will be cheaper to have a hard copy sent to you.

Here are my notes (so far) from my Ravelry page that I have made regarding the Cable Panel Chart:

I believe the Cable Pattern Chart legend needs a little more clarification. The symbol for the purl stitches should read: “purl on right side, knit on wrong side” and the symbol for the knit stitch should read: “knit on right side, purl on wrong side”.

I also used yellow marker to color in every other row to make the pattern/chart easier to follow/keep my place.

I am also using bamboo double pointed needles, 8” and one 5”. I use the 5” bamboo dpn as a cable needle. I find it works better than regular cable needles.

Just thought I would add this: Rows 22, 23 and 24 on the Cable Panel Chart are supposed to be the same as Rows 6, 7 and 8. So I added in those red circles where a black dot should be. See Photo.

The 4th photo shows what I keep handy when I am working on the cable chart. From left to right: a notepad with the rows 1-30 written down. I write hash marks by each row as I finish it. The chart with a ruler placed under the current row I am working on. The legend to be able to quickly refer to what a particular symbol means and the correction sheet to be used as I come to those areas where corrections have been made.

I had to write row 5 down because every time I came to it, I had to stop and think which direction I wanted the cables to go. So here it is for any of you who just want to knit the row without having to think about it every time you knit it.

Row 5: P3, 2/1 LPC, 2/2 RPC, P1, 2/2 LPC, 2/1 RPC, P3

Well I keep trying to add the link to my Ravelry page and a link to the pattern page and for some reason it just won’t stick.  So if you want the pattern, go to either Ravelry or Knit Picks and look up Dealla Cardigan or Celtic Journey, respectively.

3/27/16 I am working on the sleeves.  Then I will do the front band.  After that, all I will have left is to sew it together and weave in all loose ends.


Here are some pics from the designer:

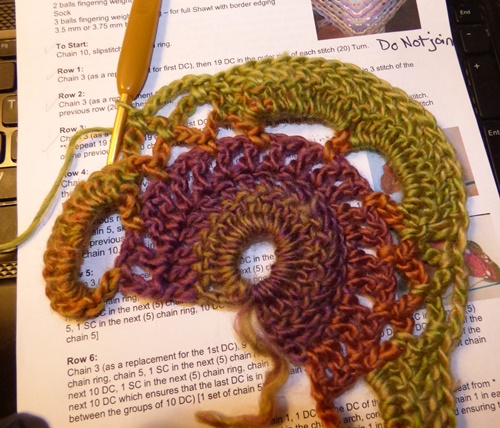
Here is where I am so far:

my dealla cardigan

Scalloped Triangle Shawl (Crochet) Photo Tutorial

http://www.ravelry.com/patterns/library/virus-shawl—virustuch2sts2

https://drive.google.com/file/d/0BzvapTN64Z4oT0M2QWhTeUN4WjhJc2VYVnMxSUtSb08yUjlZ/view?pli=1

(^See that link^ the English written version is there)

I found this wonderful crochet pattern on Ravelry.  It is easy and quick.  The pattern uses fingering/sock weight yarn and a small hook, but I used worsted weight yarn and an H hook.  I posted a photo of the completed shawl on Facebook and encouraged several of my friends to try the pattern.

I decided to do a photo tutorial in case they had questions on the instructions.   This is where I found the pattern:  http://www.ravelry.com/patterns/library/schultertuch—dreieckstuch

Scroll down the page until you see “Click here for authorized English translation.” Click on the word “here”.

Or you can click on the first link provided above for a video presentation of  how to work the shawl.

Now for the photo tutorial:

Start:

Chain 10 and join with a slip stitch.

Chain  3, make 19 dc in chain 10 space, but do not join. (20 dc) Chain 3 counts as first dc.

Chain 3 and turn.  1 dc in EACH dc  for a total of 20 (chain 3 counts as 1 dc). Your last dc will go in the top of the chain 3.

Chain 4 and turn. 1 dc AND ch 1 in each dc for a total of 20 dc.

Chain 13 and skip 1 space and sc in next space. Chain 5, skip 1 space and sc in next space. repeat for a total of 3 chain 5 sections.

I wanted to add this graph for those of you who find following a graph easier:

scalloped shawl graph

This should get you started. Follow the photographs.

T 1 T 2

Row 1:

T 3

Row 2:

T 4 T 5

Row 3:

T 6 T 7

Row 4:

T 8 T 9 T 10 T 11 T 12

Row 5:

T 13 T 14 T 15 T 16 T 17 T 18

Row 6:

T 19 T 20 T 21 T 22 T 23 T 24

Row 7:

T 25 T 26 T 27

Row 8:

T 28 T 29

Rows 9 – 12 repeat previous rows. Hope these photos help you understand the this pattern and make it easier for you to do.

P.S.    If you have specific questions that this tutorial does not answer for you, please check out the link above.

Here are photos of my first one and the second one (in progress):

STShawl 1

Project photo

ETA: here are some sites that may help you on how to block a shawl either knitted or crocheted.

http://blog.expressionfiberarts.com/2012/09/10/how-to-block-a-knitted-or-crocheted-shawl/

http://www.fickleknitter.com/archives/2011/12/how-to-block-hand-knit-triangle-lace-shawls-a-quickie-tutorial.htm

Thank you for following my blog. I am glad you like this particular post. However, since all possible questions regarding the pattern are already answered in the body of this post or the comments, no further questions will be entertained on this post.


Idle Hands and All That…….

My hands are definitely not idle.  I am always doing some crafty thing.  If I don’t keep my hands busy, they tend to want to shovel food into my mouth and my mouth never refuses. So I must keep them busy doing other things, cooking, cleaning, sewing, knitting, crocheting….something.

My latest crafty thing is this shawl.  It is a free pattern on Ravelry.

GS 2

Here is the link if you want to make this shawl yourself:

http://www.ravelry.com/patterns/library/lalas-simple-shawl

Newfie Hat and Mittens

P1040554

nh 2

Recently I came across a pattern for Newfie mittens (pattern on Ravelry)  and made them.  Then I wondered if there was one for a hat.  There were several, but they didn’t seem to meet my needs.  So I winged it and created my own version.  So for those out there who wish to try this hat, here are the instructions:

NEWFIE HAT

This is a simple hat pattern made to fit a 21-23 inch head. These instructions assume that you already know how to knit in the round with both circular and double pointed needles and understand basic knitting terminology

Materials:

1 ball of Knit PIcks Chroma Worsted (multi-color of your choice) MC

1 ball of Vickie Howell Sheep(ish) (solid color of your choice) CC

US 9 circular needles 16 inches long

US 9 double pointed needles

Yarn needle

Pat 1

K4 (CC), S2 (MC) around x 5 rounds

Purl 2 rounds with MC

Pat 2

K1 (CC) S2(MC), then K4(CC) S2(MC)around to last 3 stitches and K3(CC) x 5 rounds

Purl 2 rounds with MC

Instructions:

With MC, c/o 84 stitches onto circular needles.   K2P2 for 1.25 inches.

Join CC and begin Pat 1, alternating with Pat 2.   Repeat Pat 1 and 2 for a total of 4 times each. This will measure approximately 7 inches from cast on edge.

Cut CC yarn

Decrease with MC only:

Change to double pointed needles when necessary.  And any extra stitches at the end of decrease rounds, just knit them.

  1. (K8, K2tog) around
  2. (K7, K2tog) around
  3. (K6, K2tog) around
  4. (K5, K2tog) around
  5. (K4, K2tog) around
  6. (K3, K2tog) around
  7. (K2, K2tog) around
  8. (K2tog) around
  9. (K2tog) around

Cut yarn and slip through remaining stitches. Tighten and secure. Weave in all ends. Block if necessary.

And these are the mittens:

newfie mitts

Thinking Ahead to Halloween

And what better story than the Legend of Sleepy Hollow brings to mind ghosts and ghouls and everything Halloween.

I found this pattern on eBay while browsing the primitive doll pattern section. I had never seen a pattern for the Headless Horseman until now. So, of course, I had to get it and make it.

This is the pattern and it can be purchased on eBay.

H 1

What you will see below is my interpretation of the above pattern. I didn’t particularly care for the post in the horse’s stomach or the Sleepy Hollow banner. I also felt the jack-o-lantern’s face needed to be more menacing. Anyway, here is my interpretation.

H 2

Oh, and the book is fake. It’s a box that I painted, filled with pellets for weight and applied labels indicating the story name and author.

H 3

It was fun to work on this doll/decoration. Can’t wait for Halloween. 🙂

Oh, BTW, the whole thing measures approximately 20 inches by 20 inches.

My Raggedy Ann Doll Tutorial (Part 1)

I’ve always wanted to make a Raggedy Ann Doll of a sort. But buying a pattern to make such a common doll seemed like a waste of money. So I decided to draw my own and go from there.

mra 2

I took lots of pictures during the process so that I could offer this free pattern to any one who also wanted to make a Raggedy Ann Doll. I will try to be as explicit as possible with the instructions.

Let’s start with a Materials List.

1/4 yard muslin
1/4 yard print fabric
1/4 yard striped fabric
1/4 yard white fabric
1/4 yard black fabric
small amounts of pink, black and red felt
Thread to match felt colors
1 50g skein of red yarn
small amount of trim
6 inch dowel with one end sharpened
5-7 inch doll needle
two small buttons that the eye of the doll needle will fit thru
hand sewing needles
sewing machine (set your stitch length to teeny tiny-I set mine to “1”)
cotton thread
upholstery thread
scissors
pinking shears (optional)
hemostats
polyester fiberfill (stuffing)
printer for printing pattern
pencil
colored pencil (color will depend on your fabric colors)
straight pins

mrp 3

The pattern itself is 2 pages. You will need to right click on each photo and save it to your pictures folder. Then from there you can enlarge it to 8.5 x 11 and print it out. You will need to print at least two copies of the first page.

mrp 1

mrp 3.0

The drawn lines are stitching lines. You will cut out the pieces and trace them onto doubled fabric. You will stitch the fabric pieces before you cut them out. I used pinking shears and cut close to the stitching line.

First sew the long sides of the muslin fat quarter and the print fat quarter together, right sides together, using 1/4 inch seam. Iron the seam down. Then sew the long sides of the striped fat quarter and the black fat quarter together. Iron the seam down.

mrp 4

Make sure your striped fabric is horizontal to the black fabric.

mrp 5

Cut your pattern pieces out. Tape upper and lower body pieces together. Fold sewn fat quarters lengthwise, making sure seam lines match up and place pattern pieces on fabric as indicated in the photos. Trace around pattern pieces with pencils.

mrp 6

mrp 7

mrp 8

mrp 9

mrp 10

Trim the top and bottom the fabric so that you are not having a large amount of fabric to deal with. Then stitch just inside the lines leaving the area open as indicated on the pattern. Cut apart with pinking shears, cutting close to, but not thru the stitched lines. REMEMBER to use a very small stitch length.

mrp 11

Turn pieces right sides out.

mrp 12

mrp 13

Take your second copy of page 1 of the pattern and cut out the eyes, nose and cheeks. Place them on the doll’s face in a pleasing manner to you. Trace around them. Now place them on doubled felt and cut them out…eyes on black felt, nose on red felt, cheeks on pink felt. Set them aside until later.

mrp 14

mrp 16

Take the leg pattern piece and place on the lengthwise folded black/striped fabric (right sides together) and trace around it two times. Pin the fabric, matching the seams. Sew just inside the traced line. Cut out with pinking shears and turn right side out.

mrp 15

mrp 17

mrp 18

Okay I’m getting a little tired here. So I will continue this tomorrow (or the next day). See you back here later.

Mouse and Pumpkins

I have been on a sewing spree lately. It’s usually knitting, crocheting and sewing or all three at once. Anyway, I digress.

I bought these patterns awhile back and I’m just now getting around to making them. I love making dolls and such.

mp 3

mp 4

I decided to do the mouse and pumpkins in batiks and pinks instead of grungy fabrics. I do like the way they turned out. I also used eye shadow in the creases of the pumpkins and around the stems.

mp 1

mp 2mp 5

Boxy Bag

Found a free pattern on Craftsy for a bag to carry your shampoo, conditioner, razors, soap, deodorant, undies, etc. in.

The instructions seemed a little confusing, but as one person stated, follow them exactly and your bag will turn out fine.

I cut out fabric for four bags…thinking ahead for Christmas. Anyway, I made one bag. It was relatively easy and only took a couple or so hours to complete.

It measures approximately 7 inches long, 5 inches wide and 4 inches deep. Here are some pictures for you.

bb  1

bb 2

bb 3

bb 4

bb 5

Fingerless Mitts

Just recently I finished up some fingerless mitts. One is a pair of beer lover’s mitts I made for my oldest. He will get them for his birthday this month. The do have adult content, so if that sort of thing offends you, leave this page now.

The other pair is some minion mitts. I came across some crocheted minion mitts on Ravelry and thought I could do that in knitting. It is simple. Just take your favorite mitt pattern, whether for an adult or a child and knit the cuff area in blue. Then knit the body of the mitt in yellow with a black stripe close to the top. Sew on some large buttons. Then glue wiggly eyes to the buttons. Embroider the mouth. Viola! You have minion mitts.

JBM a

mm aa

Mma

Designing a New Sock

I am currently designing a new sock for men. I wanted something that was somewhat generic, but that men would wear. I talked with my youngest son. He said it’s all about color, not fancy stitches. So I came up with a plaid sock.

First of all, I worked it out on graph paper. I played around with it until I got it like I wanted. Then I began to implement it.

Now I am no stranger to stranded (colorwork or fairisle) knitting. I know it takes longer to knit and it also tends to draw up the width more so than just knitting with a single yarn. BUT, OMG! This sock is labor intensive. I do like the results, but I don’t think I will be making this again. If I do I will only, repeat, ONLY do the plaid section on the top or cuff of the sock and only for a short distance.

Figuring out on paper where to change colors is so much different than the actual knitting of said colors. As I said, it is labor intensive. And I still have to write it up as a pattern and place said pattern in my store for sale.

After all this work, I certainly hope the pattern sells well.

MPS2a

Oh BTW, I call it Mens Plaid PIA Sox.