http://www.ravelry.com/patterns/library/virus-shawl—virustuch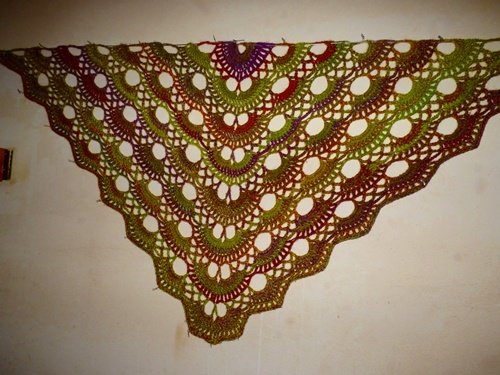
https://drive.google.com/file/d/0BzvapTN64Z4oT0M2QWhTeUN4WjhJc2VYVnMxSUtSb08yUjlZ/view?pli=1
(^See that link^ the English written version is there)
I found this wonderful crochet pattern on Ravelry. It is easy and quick. The pattern uses fingering/sock weight yarn and a small hook, but I used worsted weight yarn and an H hook. I posted a photo of the completed shawl on Facebook and encouraged several of my friends to try the pattern.
I decided to do a photo tutorial in case they had questions on the instructions. This is where I found the pattern: http://www.ravelry.com/patterns/library/schultertuch—dreieckstuch
Scroll down the page until you see “Click here for authorized English translation.” Click on the word “here”.
Or you can click on the first link provided above for a video presentation of how to work the shawl.
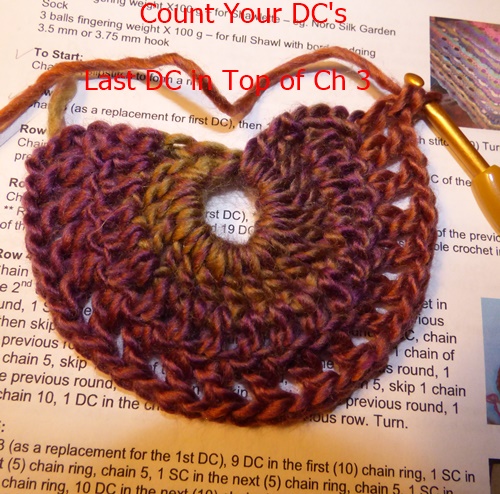
Now for the photo tutorial:
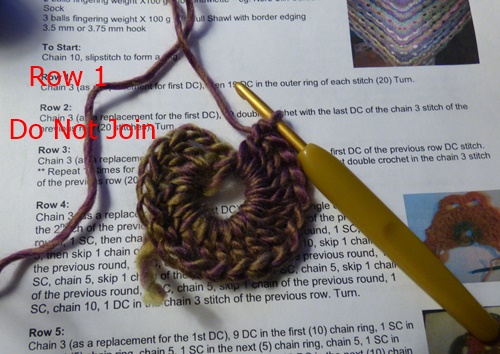
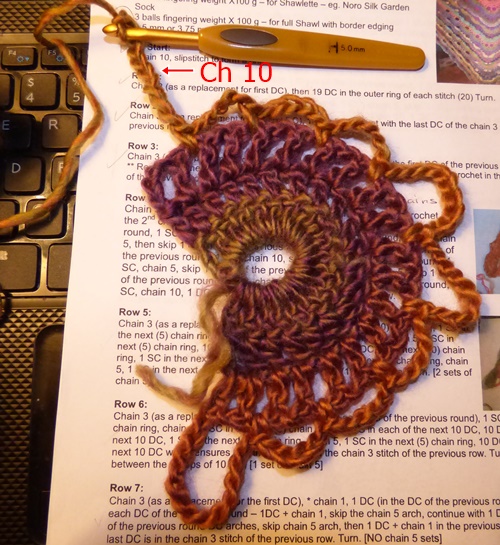
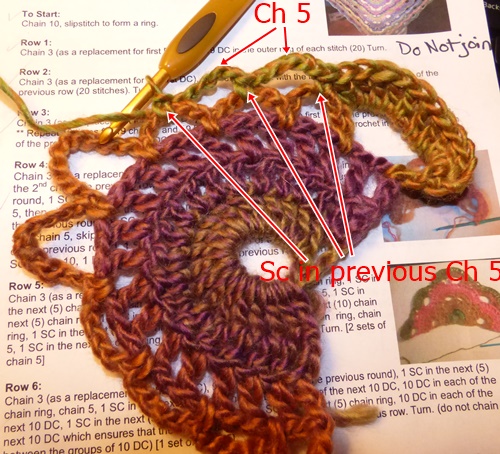
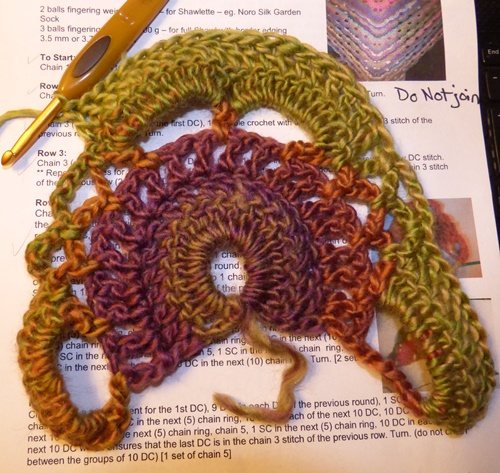
Start:
Chain 10 and join with a slip stitch.
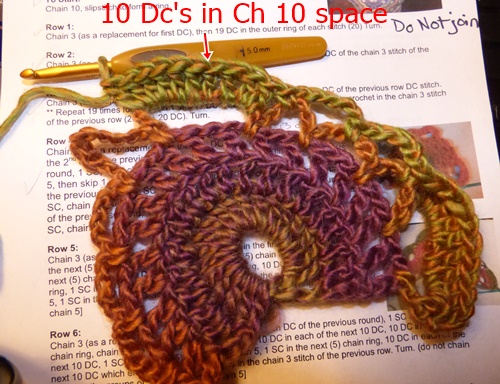
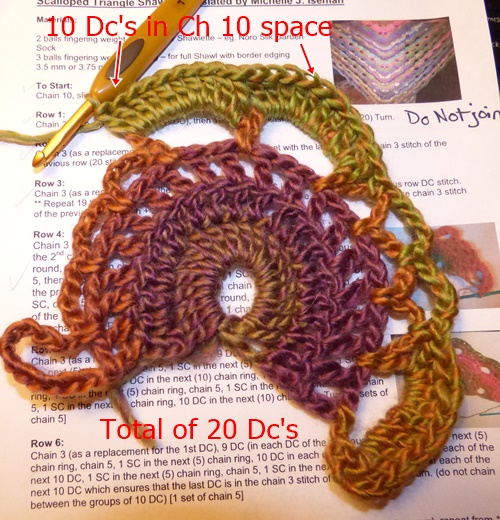
Chain 3, make 19 dc in chain 10 space, but do not join. (20 dc) Chain 3 counts as first dc.
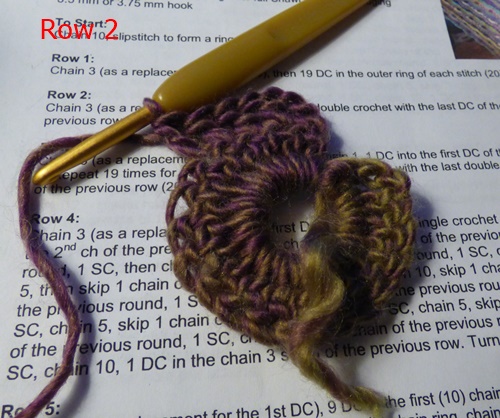
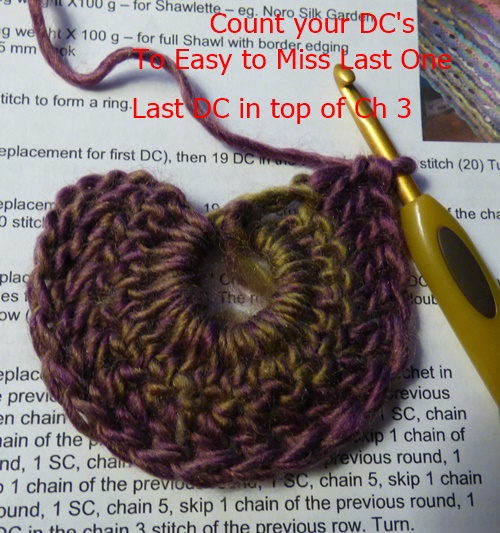
Chain 3 and turn. 1 dc in EACH dc for a total of 20 (chain 3 counts as 1 dc). Your last dc will go in the top of the chain 3.
Chain 4 and turn. 1 dc AND ch 1 in each dc for a total of 20 dc.
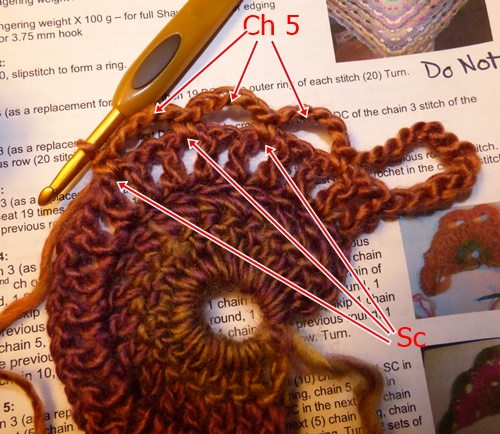
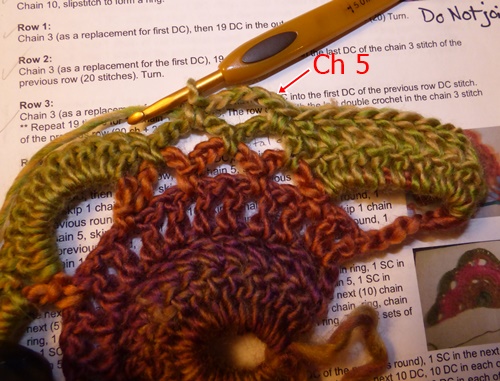
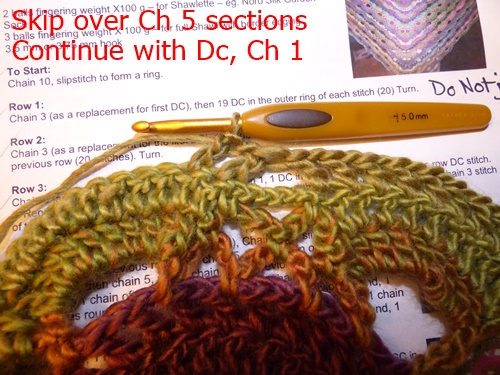
Chain 13 and skip 1 space and sc in next space. Chain 5, skip 1 space and sc in next space. repeat for a total of 3 chain 5 sections.
I wanted to add this graph for those of you who find following a graph easier:
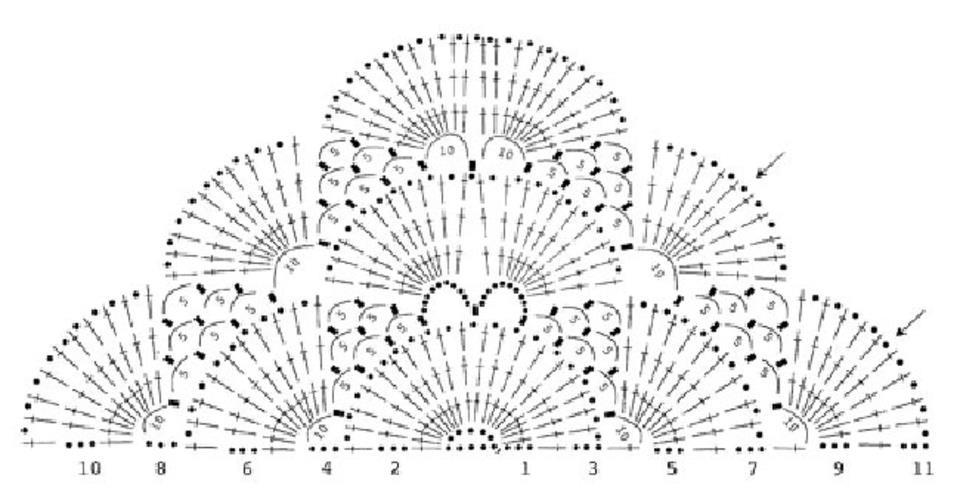
This should get you started. Follow the photographs.


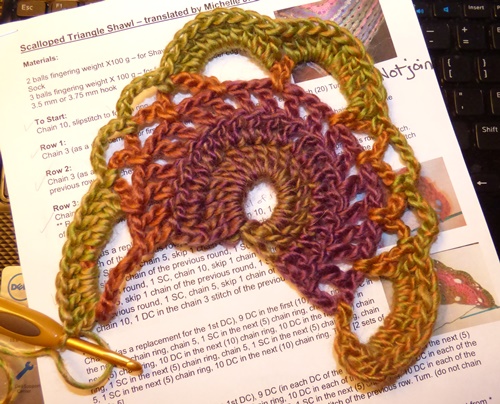
Row 1:
Row 2:
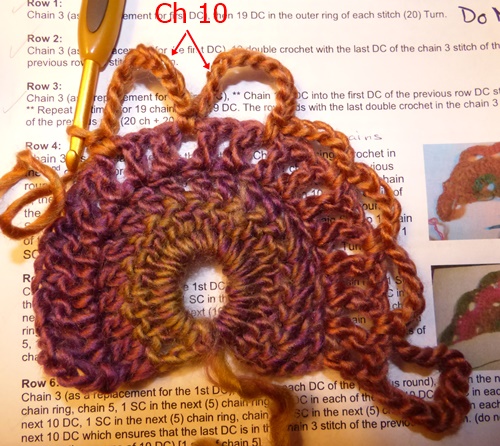
Row 3:

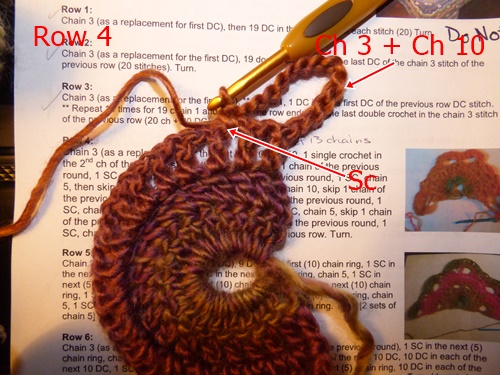
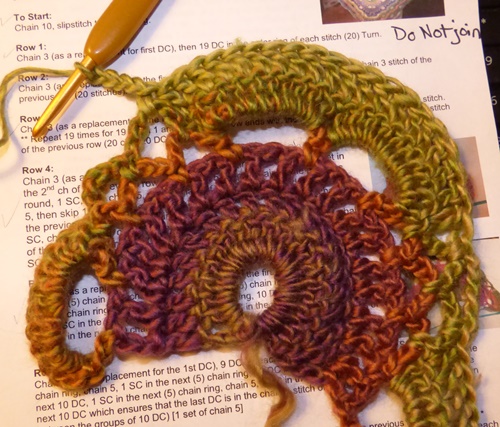
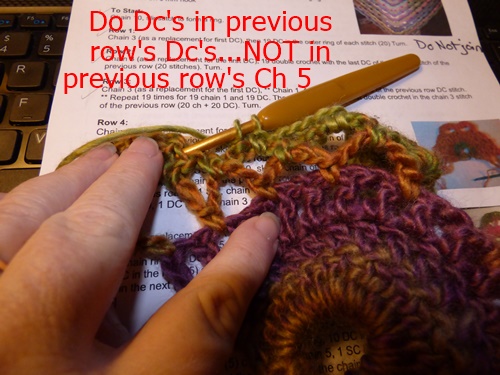
Row 4:

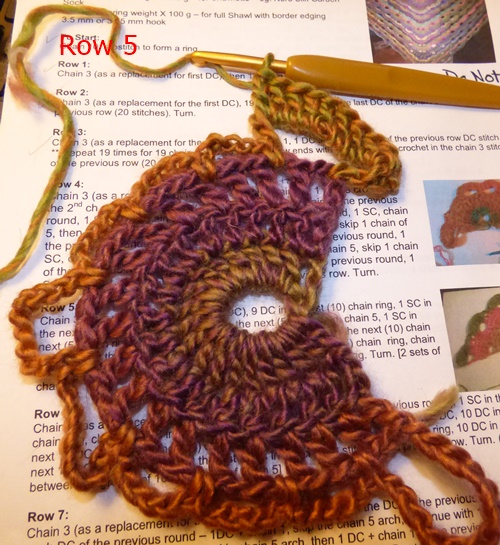
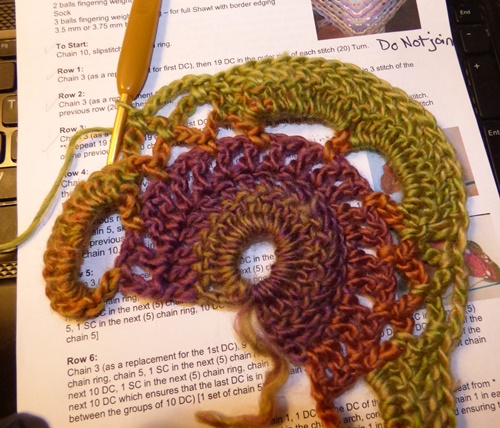
Row 5:
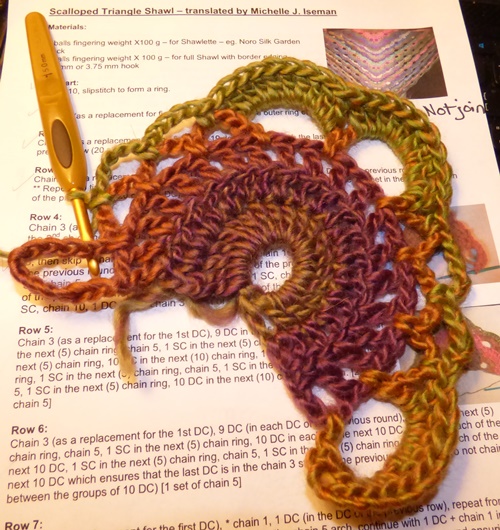
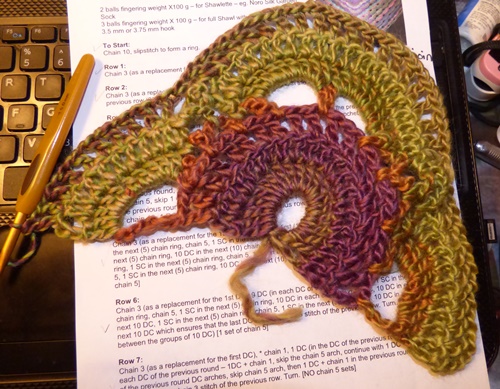
Row 6:
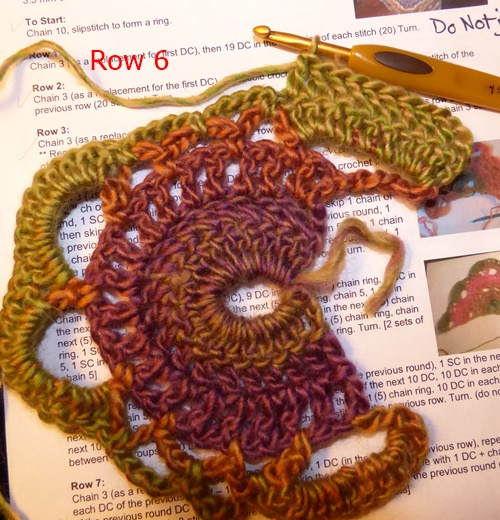
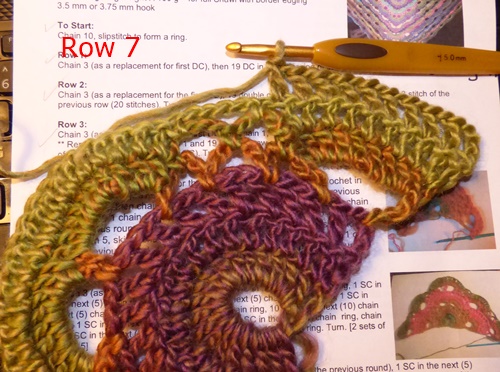
Row 7:
Row 8:
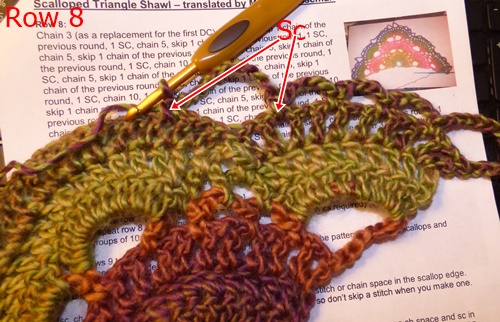
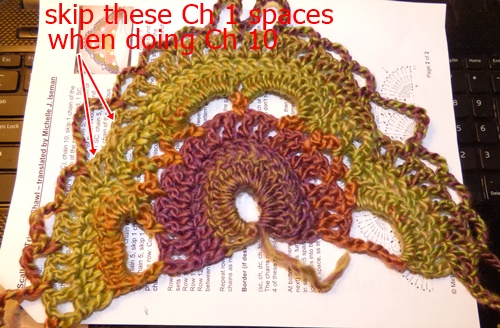
Rows 9 – 12 repeat previous rows. Hope these photos help you understand the this pattern and make it easier for you to do.
P.S. If you have specific questions that this tutorial does not answer for you, please check out the link above.
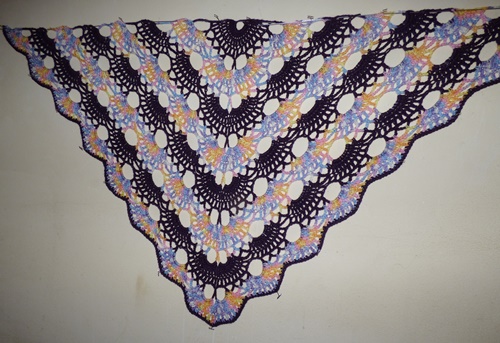
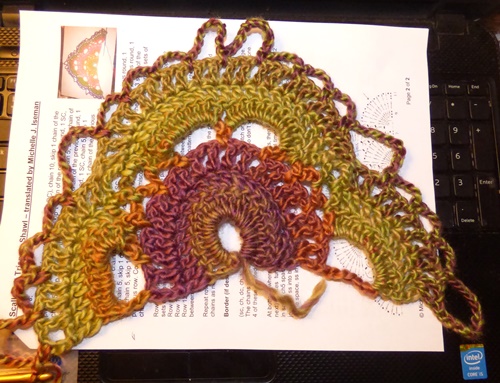
Here are photos of my first one and the second one (in progress):
ETA: here are some sites that may help you on how to block a shawl either knitted or crocheted.
http://blog.expressionfiberarts.com/2012/09/10/how-to-block-a-knitted-or-crocheted-shawl/
Thank you for following my blog. I am glad you like this particular post. However, since all possible questions regarding the pattern are already answered in the body of this post or the comments, no further questions will be entertained on this post.