I usually prefer to knit, but a friend, Donna, who recently learned to crochet, wanted to learn how to crochet mittens. She has done so well, absorbing all kinds of techniques in the field of crochet. It’s amazing that only a few weeks ago, she never held a crochet hook in her hands. She is learning at a phenominal rate.
So Donna, this is for you.
How to Crochet Mittens
Materials list:
4 ounces of sock/fingering yarn
G hook
measuring tape/ruler
yarn needle
scissors
You will need three (3) measurements. (1) Measure around your wrist. (2) Measure from your wrist to your thumb joint, actually, the space between your index finger and your thumb. (3) And measure from your thumb joint to the tip of your middle finger.


We will begin with the cuff. With your G hook, chain 11.

SC (single crochet) in second chain from hook and in the remaining chains.

Chain 1 and turn. SC in the BACK loop of the last SC made and in each chain across (10 SC). This will give a ridged/ribbed look to your cuff. Be careful. It is easy to miss that first SC each time you turn to do your next row. Count your stitches. There should always be 10 SC.

Continue in this manner until your cuff reaches your wrist measurement.

Now bring the short ends up to meet each other. Slip stitch them together. If you wish to change colors, then cut the yarn and attach your new color. If not, then continue on with the same color. I changed colors so that it would be easier to see how the mitten is done.

I also used scrap yarn to mark the spot where each new round begins which you will notice in one of the pics below. Join your new color or continue with your same color. SC in each space BEFORE AND AFTER each ridge. So there will be 2 SC between each ridge.


Do Not join in the usual manner. You will continue with SC around as in a spiral. This round will also be your increase round. SC twice in the first SC of previous round, then SC once in each of the next 8 SC. Then SC twice in the next stitch, and SC once in each of the next 8 stitches. Continue in this manner until you have come back around to your marker.
SC in each stitch around continuously until your mitten has reached your wrist to thumb joint measurement.

To create the thumb opening, you will chain 4 or 5, maybe even 6, depending on the size of your thumb. Skip 4 or 5 or 6 SC in the previous round, and SC in the next stitch. (I chained 4 as I have small hands.) If in doubt as to the size of your thumb, stick it in the opening to see how it fits.
Continue to SC in each stitch around until the piece reaches from your thumb joint to just within 1/2 inch or less of your middle finger. If you want very roomy mittens, continue around until the piece equals your 3rd measurement from the thumb joint to tip of middle finger.


Now it is time to begin your decreases. Keep in mind where your yarn marker is as you do each round.
To decrease, insert hook into next stitch and draw up a loop. Then insert your hook in the NEXT stitch and draw up another loop. You will have 3 loops on your hook. Bring your yarn over the hook and pull it through all 3 loops. You have just made 1 decrease.


SC in each of the next 8 stitches. Decrease again as described above. Continue around in this manner until you have come back around to your marker.
Do the next round even…No decreases.
At the beginning of the next round, Decrease, then SC in each of the next 7 stitches. Continue this around until you have reached your marker. Do the next round even.
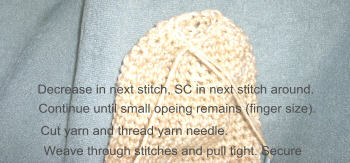
Decrease, then SC in the next stitch. Decrease, then SC in the next stitch. Repeat this around to marker. This will make your opening at the top of the mitten small, about finger size.
Cut the yarn and thread it into your yarn needle. Slip the threaded needle through the stitches around and pull tight. Secure the thread by going through several of these tightly pulled stitches. Then slip it down through the center of the stitches and secure on the inside of your mitten. Yes, you will have to turn it inside out to do this. Cut the yarn leaving approximately 1 inch on the inside of your mitten. Turn your mitten right side out.


Now it is time to do the Thumb.
Attach your yarn to the bottom stitches. SC in each stitch. Make two (2) SC in the corner. SC in each of the top stitches. Make two (2) SC in the next corner.
SC around in a spiral as you did for the hand part of the mitten until the piece reaches the tip of your thumb.


Decrease in the next stitch. SC in the next one. Repeat around. Finish as for top of mitten. You know, cut your yarn, thread your needle, etc. Secure both on right side and wrong side. Weave in any loose ends.
This mitten can be used for either hand by “rolling” the mitten between your hands to adjust where the thumb placement is.


Make your second mitten.
I hope I have not thoroughly confused you.